
Its been FIVE months since I last posted….how has that time gone so fast?!? I’ve still been around just more on Instagram, Snapchat and a little Twitter and Facebook but for some reason finding half an hour to bang out a blog post just hasn’t happened.
I’ve also been super busy moving house and trying to get client projects finished but I’M BACK!!
Last week I finally had a moment to turn my attention to my own home and two dining room chairs I purchased at the end of last summer for a mere £5 – an absolute bargain when you see how they have turned out.

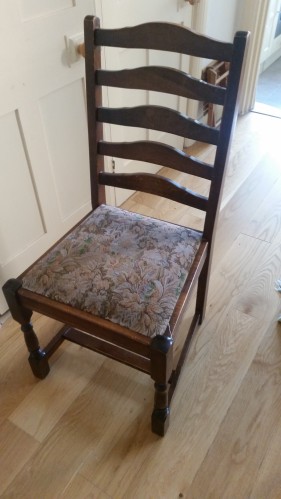
These chairs were probably once lovely but lots of wear and tear had left them looking pretty worn out. Since they were already varnished and I could not quite find the time to sand them back properly I popped down to my local DIY superstore and purchased a tin of chalk paint and a tin of matt lacquer to apply once the coats of paint had dried.
I’ve only used chalk paint a couple of times before and if you have never tried, it for your next project I would urge you to give it a go, it’s a game changer. Chalk paint can be applied to surfaces that are already painted so no need to spend time sanding back to the raw frame. As long as the surface is clean and free from grease it should give you a beautiful, even finish.
I had deliberately purchased chairs that had removable bases as I wanted to be able to reupholster fairly easily.

Before I started painting, I simply removed the seat base, gave the frames a wipe to ensure they were clean and applied the paint.
I applied two coats of the chalk paint and then once they had dried applied the lacquer. I selected a matte application for this project although you can get gloss. It dries within 4 hours and just adds an extra protective layer.
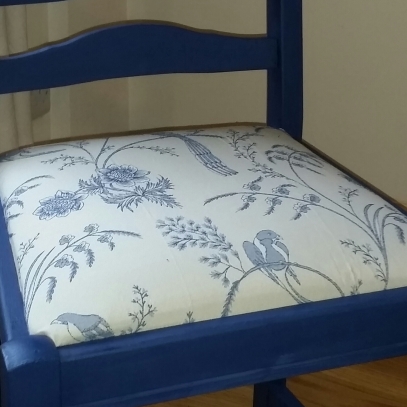
The fabric I used for these chairs was actually an offcut from an old curtain I bought from a fabric store about ten years ago for 50p….a real bargain and as it was really thick fabric I know it will be suitable for seating as it should uphold wear and tear well.

To cut the fabric I basically used the existing seat as a template and left about 10cm on side so there would be enough fabric to fold and secure properly.
I cut the fabric using pinking shears (to prevent it from fraying) and then placed the base underside up on top of the fabric.
To secure the fabric to the base I used a glue gun which I have always found effective as well as folding the edges and double securing them with a staple gun. You have to make sure you pull the fabric really tight otherwise it wont sit correctly on the base.
Once everything was thoroughly dried I placed the base back into the frame and voila! A pair of beautiful ‘new’ chairs that have totally brightened up my dining room.


Well done! I love the color and fabric choices
LikeLike
Thank you and thanks for stopping by! I’m really pleased with the finished result.
LikeLike